이번 글 시리즈에서는 GCP에서 MLOps환경을 어떻게 구성하는지 그리고 Feast Feature Store에 대해 이야기해보려합니다.
https://cloud.google.com 에 접속하여 무료로 시작하기 버튼을 눌러 시작합니다.
1. Colab, GCP에서 Feast Feature Store 세팅하기
https://colab.research.google.com/ 에 접속하여 Feature Store 생성합니다.
Colab에서 아래 코드를 실행합니다. Feast [GCP]를 설치하고 인증합니다.
## Feast 설치
!pip install feast['gcp']
!feast version

## 반드시 런타임 재시작 하기

## Colab 인증하기
from google.colab import auth
auth.authenticate_user()

## GCP 환경 설정(에러가 만약에 나타나는 경우)
### https://github.com/feast-dev/feast/issues/2117
import dill
dill.extend(use_dill=False)
GCP를 접속하여 Project를 생성합니다.
- [리소스 관리]-[Project 만들기]-[gcp-mlops-feast-project]
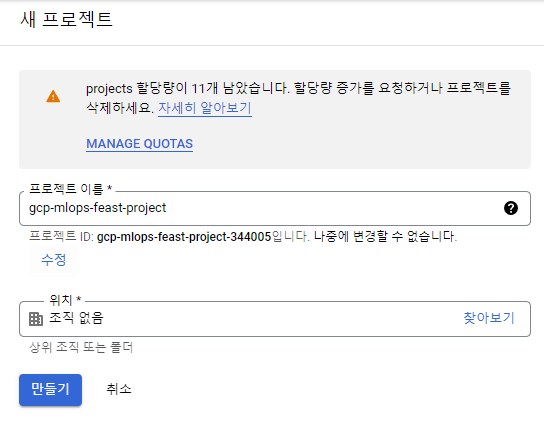
- Project ID 확인
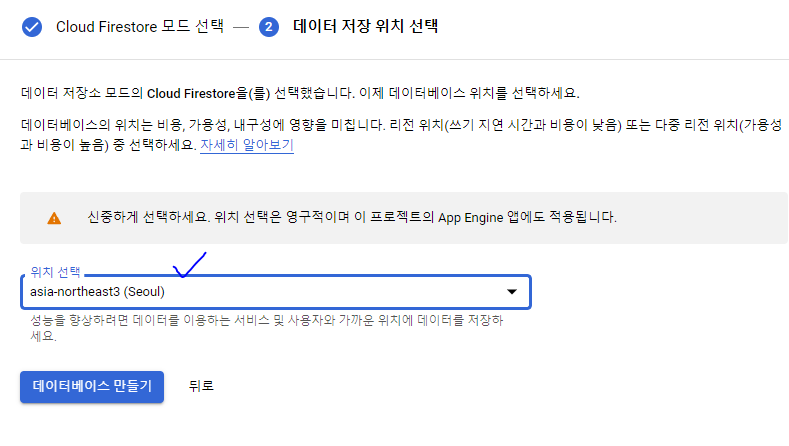
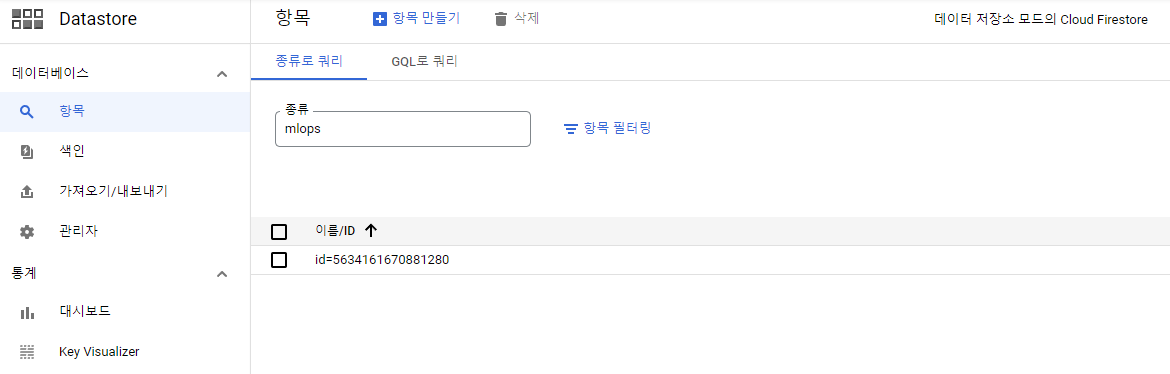
Cloud Firestore를 생성합니다. 설정하면 대부분 세팅이 영구적이기 때문에 유의해야합니다.
- 데이터 저장소 모드 선택

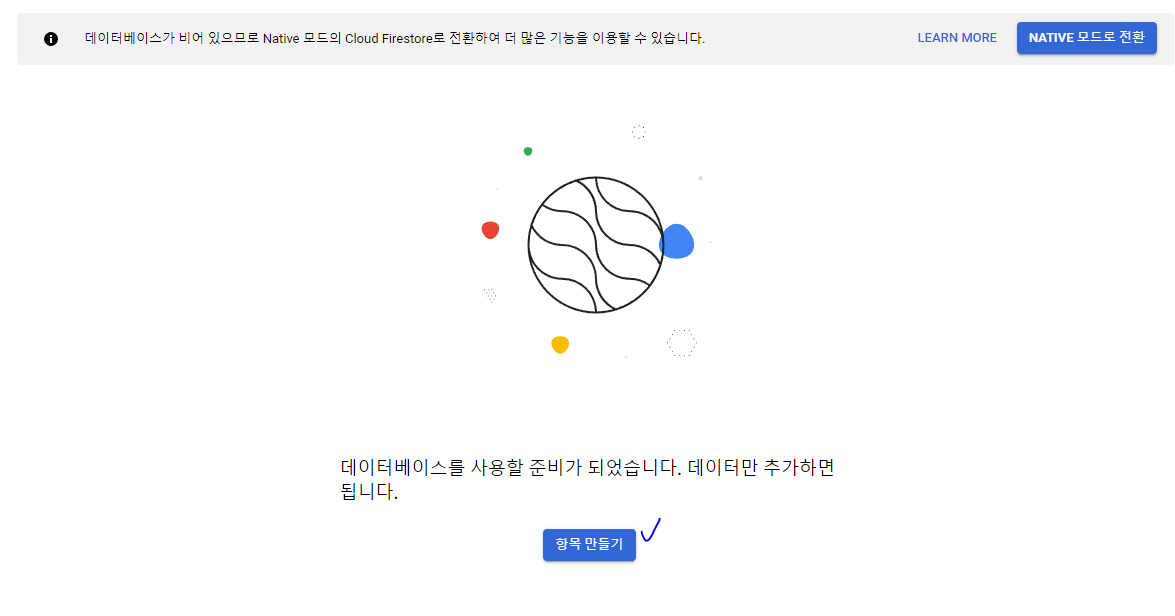
- 데이터베이스 생성
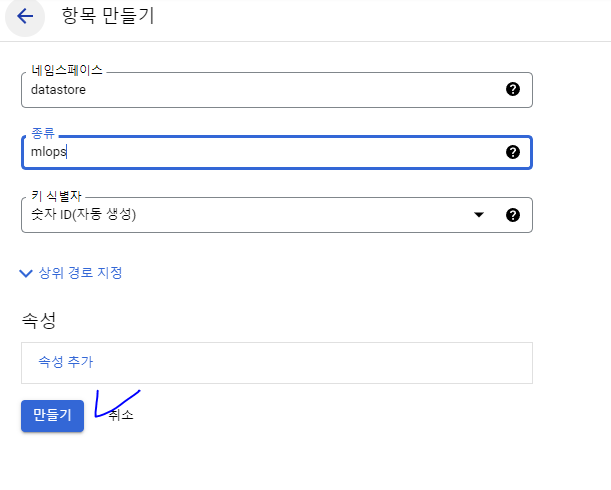
- 항목 만들기
- 네임스페이스 : datastore
- 종류 : mlops
Cloud Storage에서 버킷 이름을 확인합니다.
- gcp-mlops-feast-project.appspot.com
Dataset 이름과 Model 이름을 정합니다. 반드시 ' _ ' 로 연결해야합니다.
- Dataset : gcp_mlops_feast_dataset
- Model : gcp_mlops_feast_model
Colab에서 아래와 같이 저장을 하고 실행을 합니다.
PROJECT_ID= "<your project id>"
BUCKET_NAME= "<your bucket name>"
BIGQUERY_DATASET_NAME="<위에서 정한 Dataset 이름>"
AI_PLATFORM_MODEL_NAME="<위에서 정한 Model 이름>"

! gcloud config set project $PROJECT_ID
%env GOOGLE_CLOUD_PROJECT=$PROJECT_ID
!echo project_id = $PROJECT_ID > ~/.bigqueryrc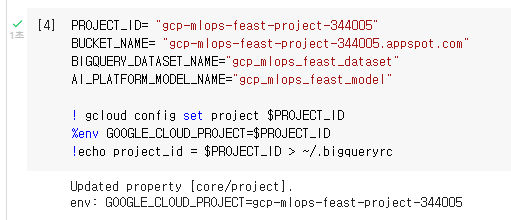
BigQuery Dataset을 만듭니다.
- 웹에서 만드는 방법 : https://console.cloud.google.com/bigquery 에서 [데이터 추가]
- 노트북에서 만드는 방법 : 아래 코드를 실행합니다.
! bq mk $BIGQUERY_DATASET_NAME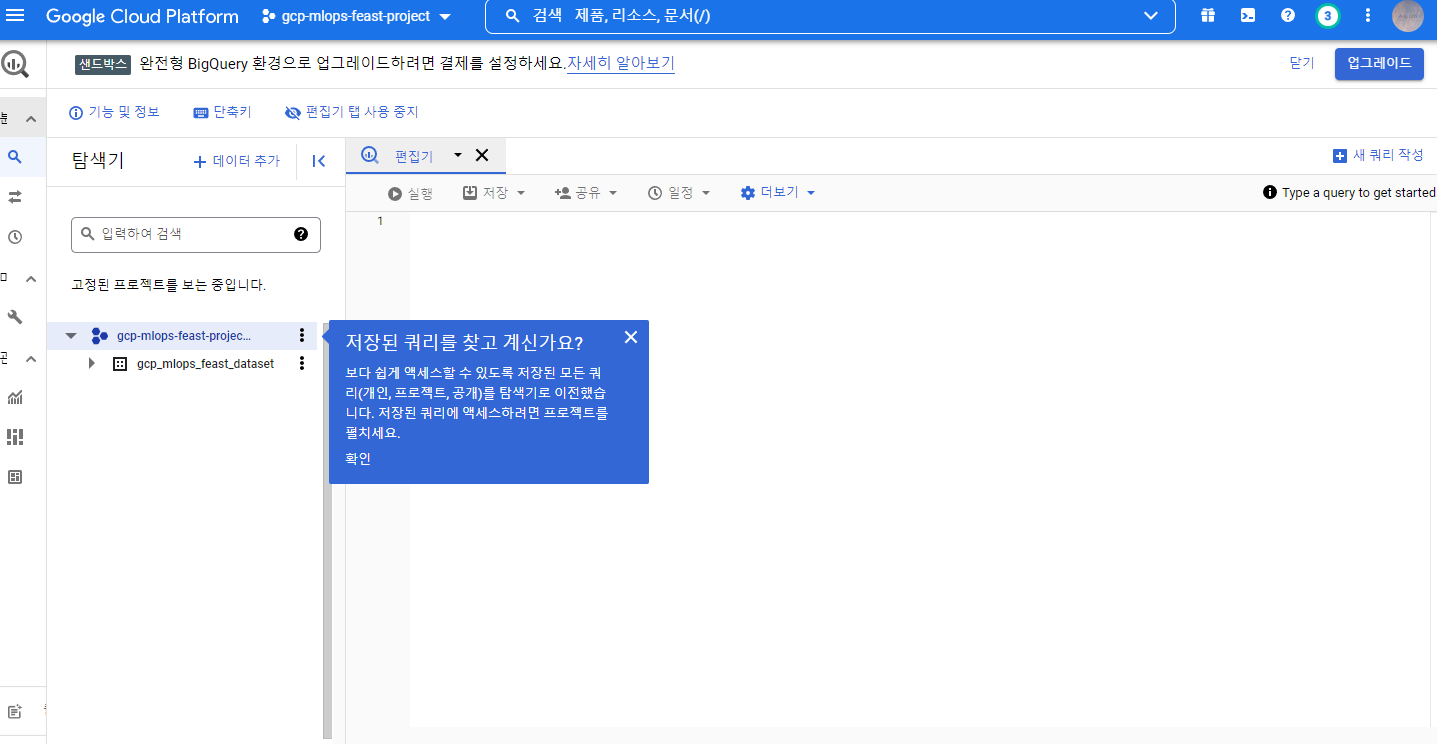
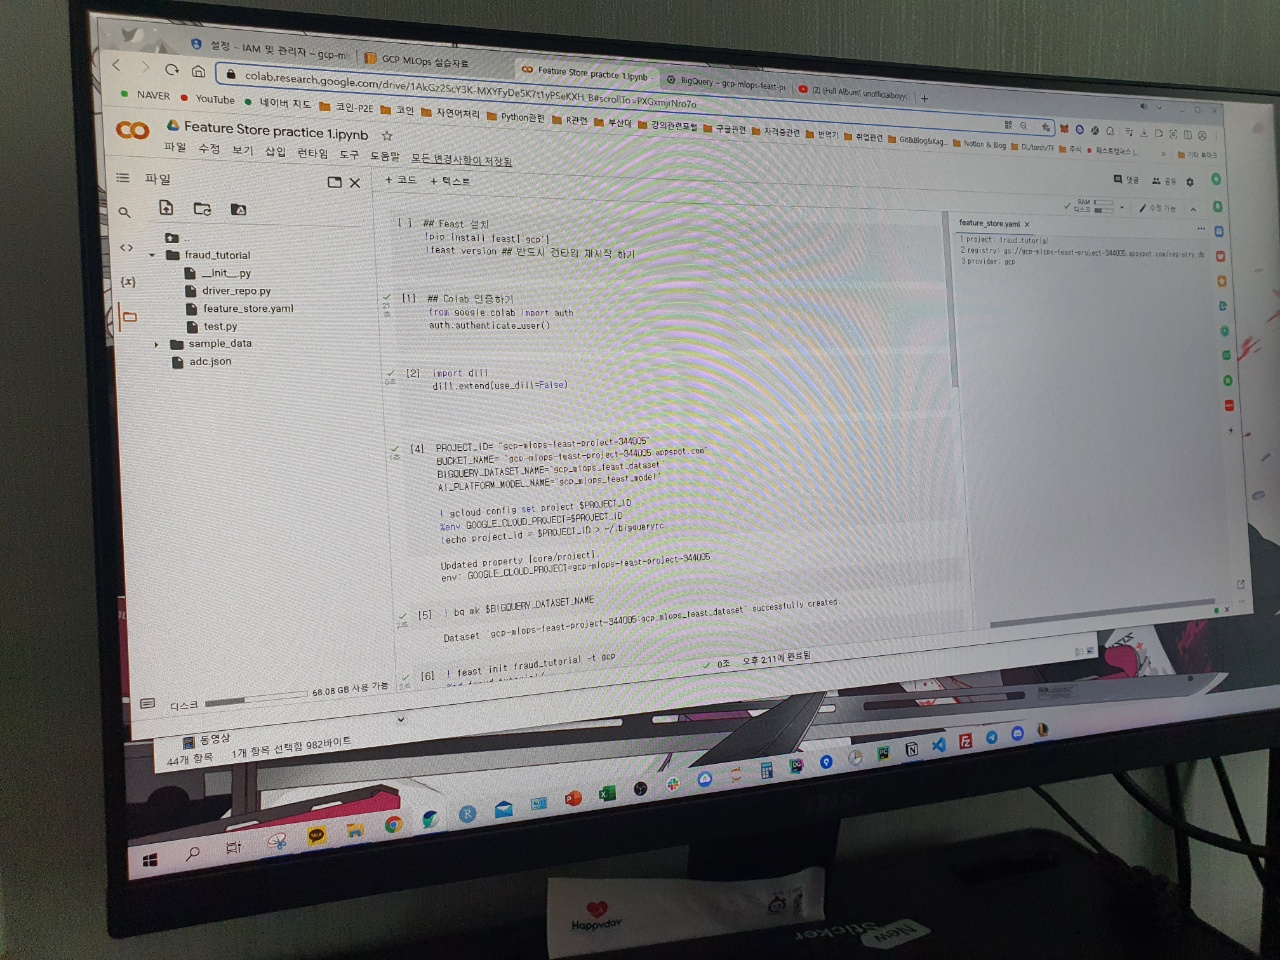
이전에 Feast 에서 배웠던 것 처럼 Colab에서도 따라합니다. 우선 Feast feature repository 초기화를 수행합니다.
! feast init fraud_tutorial -t gcp
%cd fraud_tutorial/
! ls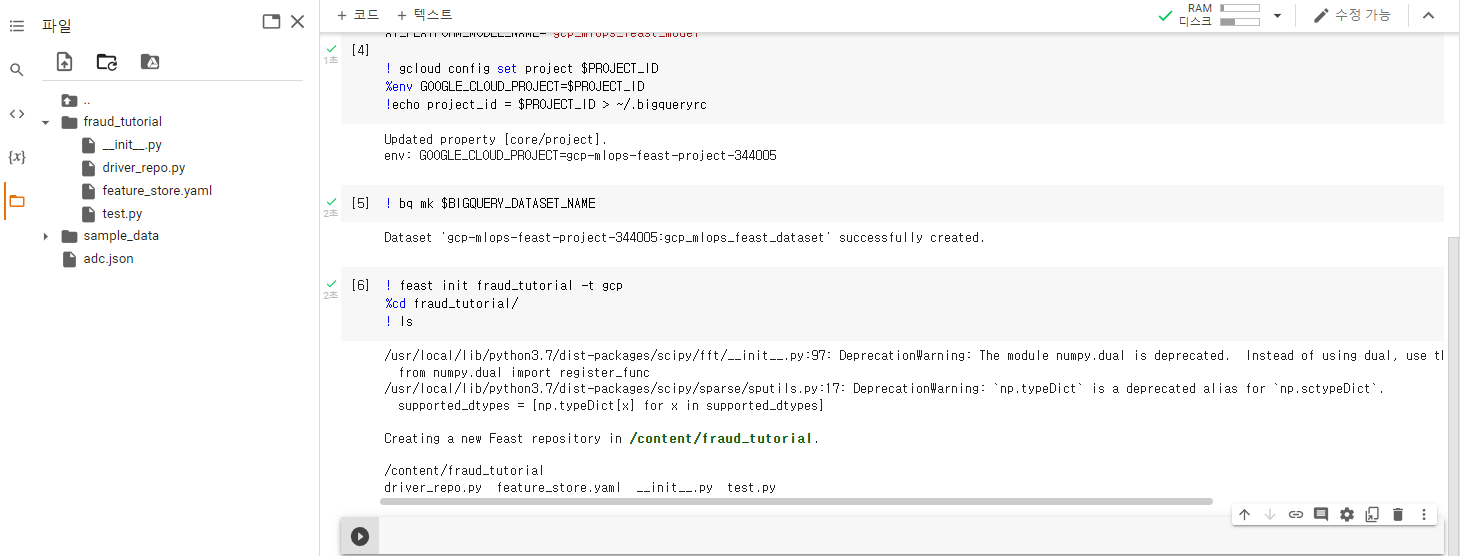
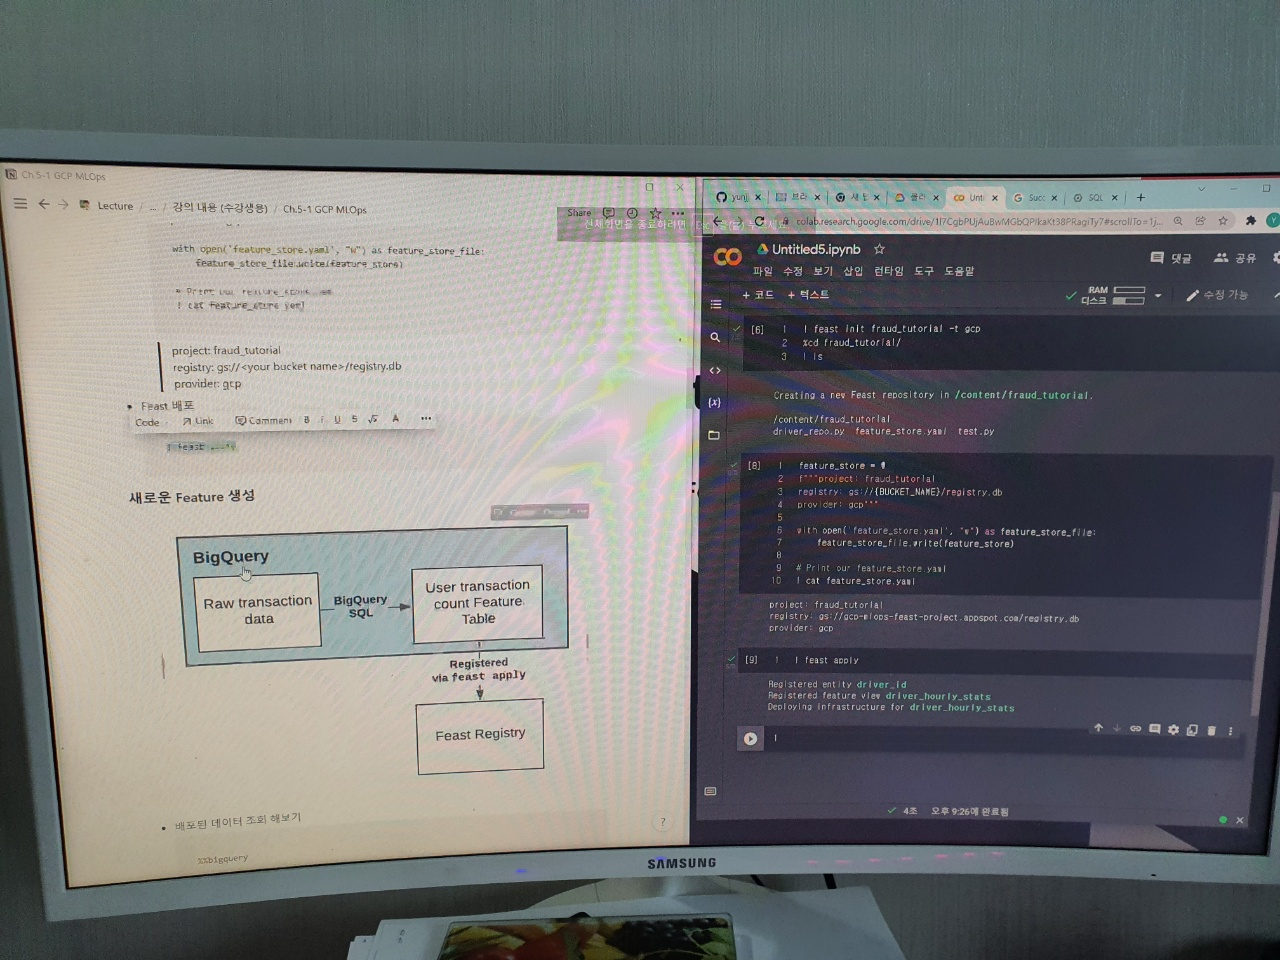
레지스트리를 GCP 버킷에 저장을 해야하기 때문에 colab에서 feature_store.yaml 파일을 수정합니다.
feature_store = \
f"""project: fraud_tutorial
registry: gs://{BUCKET_NAME}/registry.db
provider: gcp"""

with open('feature_store.yaml', "w") as feature_store_file:
    feature_store_file.write(feature_store)

# Print our feature_store.yaml
! cat feature_store.yaml
이제 Feast를 배포 합니다.
! feast apply
2. BigQuery에서 새로운 Feature 생성하기
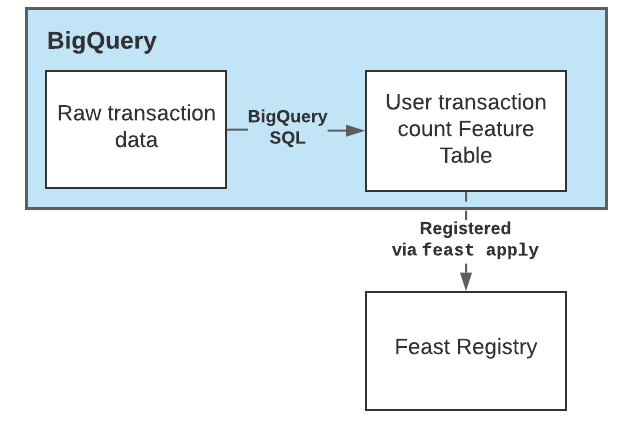
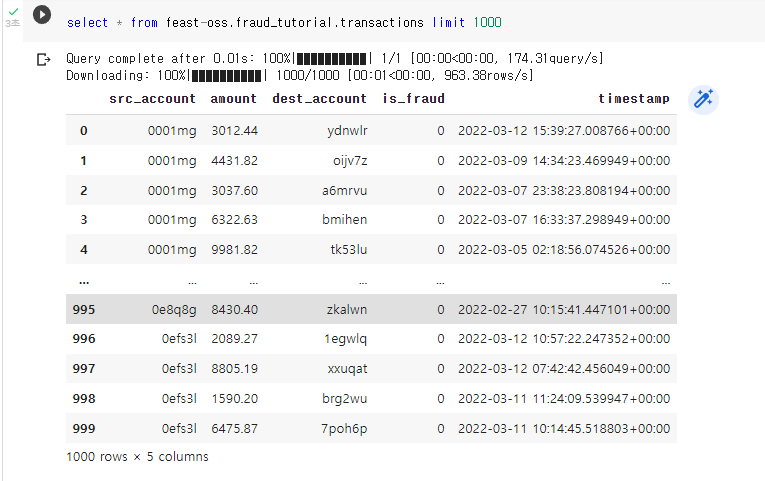
먼저 빅쿼리에서 한번 데이터 조회를 해보겠습니다.
이제 새로운 Feature를 생성하기 위한 빅쿼리 코드입니다. Count 관련 새 Feature를 뽑는 함수입니다. 이를 실행합니다.
from datetime import datetime, timedelta
from google.cloud import bigquery
import time

def generate_user_count_features(aggregation_end_date):
    table_id  = f"{PROJECT_ID}.{BIGQUERY_DATASET_NAME}.user_count_transactions_7d"

    client = bigquery.Client()
    job_config = bigquery.QueryJobConfig(destination=table_id, write_disposition='WRITE_APPEND')

    aggregation_start_date = datetime.now() - timedelta(days=7)

    sql = f"""
    SELECT
        src_account AS user_id,
        COUNT(*) AS transaction_count_7d,
        timestamp'{aggregation_end_date.isoformat()}' AS feature_timestamp
    FROM
        feast-oss.fraud_tutorial.transactions
    WHERE
        timestamp BETWEEN TIMESTAMP('{aggregation_start_date.isoformat()}')
        AND TIMESTAMP('{aggregation_end_date.isoformat()}')
    GROUP BY
        user_id
    """

    query_job = client.query(sql, job_config=job_config)
    query_job.result()
    print(f"Generated features as of {aggregation_end_date.isoformat()}")


def backfill_features(earliest_aggregation_end_date, interval, num_iterations):
    aggregation_end_date = earliest_aggregation_end_date
    for _ in range(num_iterations):
        generate_user_count_features(aggregation_end_date=aggregation_end_date)
        time.sleep(1)
        aggregation_end_date += interval

if __name__ == '__main__':
    backfill_features(
        earliest_aggregation_end_date=datetime.now() - timedelta(days=7),
        interval=timedelta(days=1),
        num_iterations=8
    )
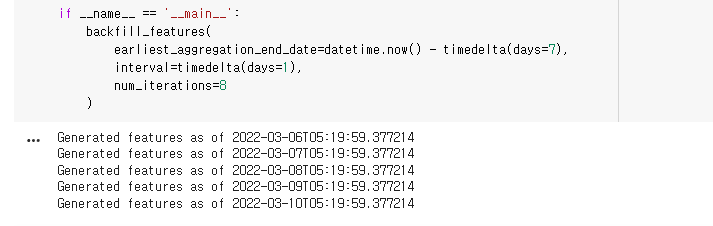
실행을 하면 기준일로 부터 7일간의 유저 트랜잭션 카운트 데이터가 생성됩니다.
이제 빅쿼리에서 새로운 Feature들이 생겼는지 확인해보겠습니다.
%%bigquery

# select * from <데이터 세트 이름>.user_count_transactions_7d limit 100
select * from gcp_mlops_feast_dataset.user_count_transactions_7d limit 100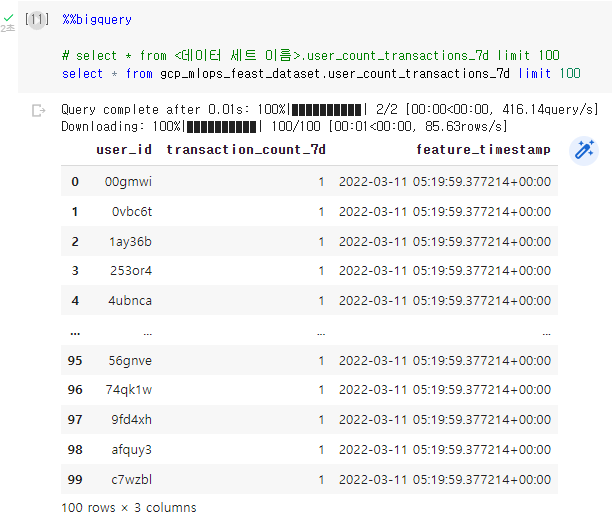
FeatureView를 생성합니다. fraud_features.py를 생성합니다.
fraud_features = \
f"""
from datetime import timedelta
from feast import BigQuerySource, FeatureView, Entity, ValueType

# Add an entity for users
user_entity = Entity(
    name="user_id",
    description="A user that has executed a transaction or received a transaction",
    value_type=ValueType.STRING
)

# Add a FeatureView based on our new table
driver_stats_fv = FeatureView(
    name="user_transaction_count_7d",
    entities=["user_id"],
    ttl=timedelta(weeks=1),
    batch_source=BigQuerySource(
        table_ref=f"{PROJECT_ID}.{BIGQUERY_DATASET_NAME}.user_count_transactions_7d",
        event_timestamp_column="feature_timestamp"))

# Add two FeatureViews based on existing tables in BigQuery
user_account_fv = FeatureView(
    name="user_account_features",
    entities=["user_id"],
    ttl=timedelta(weeks=52),
    batch_source=BigQuerySource(
        table_ref=f"feast-oss.fraud_tutorial.user_account_features",
        event_timestamp_column="feature_timestamp"))

user_has_fraudulent_transactions_fv = FeatureView(
    name="user_has_fraudulent_transactions",
    entities=["user_id"],
    ttl=timedelta(weeks=52),
    batch_source=BigQuerySource(
        table_ref=f"feast-oss.fraud_tutorial.user_has_fraudulent_transactions",
        event_timestamp_column="feature_timestamp"))
"""

with open('fraud_features.py', "w") as fraud_features_file:
    fraud_features_file.write(fraud_features)
폴더에 이렇게 생긴 것을 확인합니다. 예제파일인 driver_repo.py는 삭제하겠습니다.

그 후 feast 배포를 합니다.
!feast apply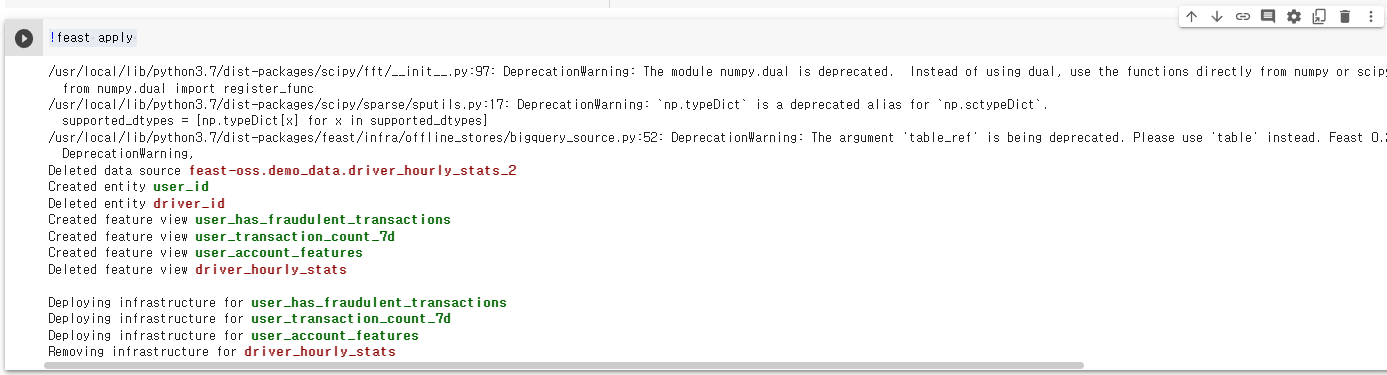
feature view 등록된 것을 확인할 수 있습니다. 이 과정에서 빅쿼리가 쓰인 것이 포인트입니다. 다음 글에서는 모델 훈련과 배포를 하겠습니다.
패스트캠퍼스 [직장인 실무교육]
프로그래밍, 영상편집, UX/UI, 마케팅, 데이터 분석, 엑셀강의, The RED, 국비지원, 기업교육, 서비스 제공.
fastcampus.co.kr
* 본 포스팅은 패스트캠퍼스 환급 챌린지 참여를 위해 작성되었습니다.
 |
 |

'AI > MLOps' 카테고리의 다른 글
| [패스트캠퍼스 챌린지 49일차] GCP - Feast FastAPI App 배포 (0) | 2022.03.13 |
|---|---|
| [패스트캠퍼스 챌린지 48일차] GCP - Feast Feature Store (2) (0) | 2022.03.12 |
| [패스트캠퍼스 챌린지 46일차] Amazon SageMaker Autopilot 실습 (0) | 2022.03.10 |
| [패스트캠퍼스 챌린지 45일차] Amazon SageMaker 계정 생성 & Amazon SageMaker Autopilot (0) | 2022.03.09 |
| [패스트캠퍼스 챌린지 44일차] Python 기반 Jenkins CI Pipeline Build (0) | 2022.03.08 |